|
|||
|
|
|
||
| View Shopping Cart |
| Home |
| Guides Available |
| About the Author |
| FAQs |
| Testimonials |
| Articles |
| Contact Andrew |
| Terms & Conditions |
| Mailing List |
| Links |
 |
 |
Get more great
articles like this one absolutely free with every
Gibbs Guides e-magazine. Join
the mailing list!
How To Land An RC Model
Part 1: The Approach to Land
Article by Andrew Gibbs
There’s a saying in the world of full size flying that applies equally to model flying; all take offs are optional; but every landing is compulsory!
Getting the model safely back on the ground is every RC pilot’s an objective. The skill of landing can be challenging to master, but the odds of success are much higher if some genuinely practical and effective techniques are used. It’s my experience that such techniques are not well known, and so the aim of this article is to offer some sound advice.
Many of the techniques for landing an RC model presented here have been borrowed from the world of full size flying. You should find they work well for any conventional, reasonably well designed model with normal handling characteristics. Let’s get started!
1. Start with trimming
All pilots of full sized aircraft and models know that aircraft need to
be slowed down for a landing. With this in mind, the usual practice in
model flying is simply to reduce throttle and start descending for the
landing approach. However, the mere fact of reducing the throttle setting
probably won’t cause your model to actually fly any slower. The
reason for this is that when the throttle is reduced, normal, conventionally
set up models have a built-in tendency to drop the nose. This is the same
as for full size aeroplanes. This tendency to descend when the throttle
is closed serves to actually maintain the model’s airspeed, not
reduce it.
To get the model to fly more slowly, with the model in level flight, reduce the throttle setting and add sufficient up elevator trim so that the model maintains its height. You can try this in small increments; start by just reducing the throttle by a few clicks, and then re-trimming for level flight. You will find that your model is then trimmed to fly at a slower speed. You can repeat this until the model has been trimmed to fly at a sensible speed to make an approach.
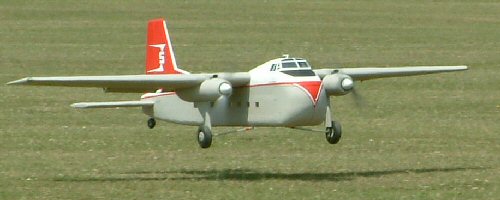
You should find that once trimmed appropriately for an approach to land, the model will adopt a slightly nose up attitude in level flight. The nose up attitude will generally be approximately 2 degrees or so. The exact attitude of your model will vary depending on the design of the model and how you have trimmed it.
|
|


Of course, it’s possible to take the trimming process too far - if the model is trimmed for flight at a dangerously low airspeed, it will be prone to stalling and this must of course be avoided, especially on the approach where there is little opportunity to take corrective action. For this reason, you’ll need to find the elevator trim setting that causes your model to maintain a slower, but still safe approach speed. To check your model is trimmed with a sufficient margin of speed to be safe from a stall on approach, you can try circling at 60 degrees of bank, maintaining level flight. Make sure you are at a safe altitude when carrying out this check; if the model stalls you need to be high enough to be able to recover with a good margin of height above the ground. If the model can still be circled at 60 degrees of bank without stalling, this indicates the model is trimmed for a speed which should give at least a 40% margin of speed above the stall. This is a higher margin of safety than a full size aeroplane would require, but it is appropriate as we don't have an airspeed indicator (ASI) to help us. Once you have found a trim setting that reliably works for your model, for example ‘6 beeps of up trim’, you can use this setting every time without the need to perform this check.
Once you have found a suitable trim setting for approach, do not allow the angle of bank to exceed around 30-35 degrees, otherwise you will be eating in to your margin of safety.
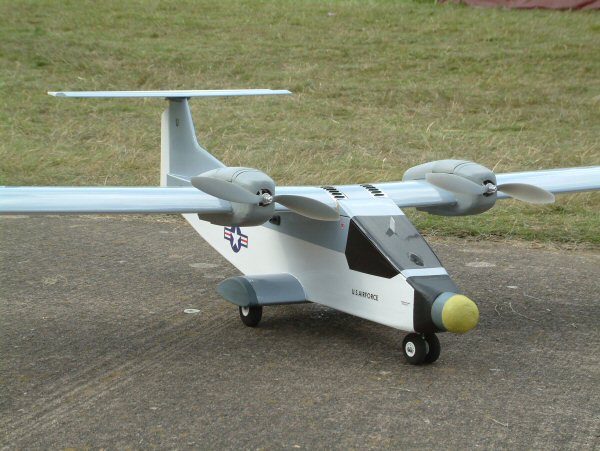
Before making an approach, it would also be wise to check the model’s behavior when you add power to go around. There will probably find there is a tendency for the nose to rise when power is applied. The tendency for the nose to pitch up under power will depend on the design and set up of the model. Just like a full size aircraft, the tendency can be quite strong when up elevator trim has been added, especially with high wing models. Before you make an approach, make sure you know how your model will behave if you need to go around, and be ready to apply down elevator as you apply power, if required.
Once the model has been trimmed for slow speed flight, it’s a very good idea to use the rudder in conjunction with the ailerons when turning. This will help to avoid a tip stall, which can be provoked by excessive travel of the downgoing aileron.
| Check the behavior of the model when go around power is applied. | Descend primarily by reducing power, not by using the elevator. |


2. Descend by reducing power
Once the model has been trimmed for a sensible approach speed, if the
throttle is then gently reduced further, the model will start to descend
while maintaining the speed set by the elevator trim. The angle of the
approach path can be adjusted by using the throttle. If you find the model
is too high, simply reduce throttle a little more. Conversely, if it’s
too low, add a bit of power.
Ideally, you should start the descent with the power set such that only small power adjustments are needed to reach the runway threshold at a suitable height, say about 1-2 wingspans. If you find you are consistently too high at the threshold, make your next approach longer in distance and/or start from a slightly lower height.
3. Judging the approach path
There can be some difficulty in judging the approach path. To bring an
element of consistency into your landings, it’s a good idea to try
to start every approach from the same point in the sky, and to make the
turn onto the crosswind and final legs at specific points.
However, it can be difficult to determine with any precision exactly where a model is in three dimensions from your vantage point on the ground. We have no way of knowing how far away a model is except by observing its size, but we can at least gain an idea of its bearing by referring to landmarks.
Making use the landmarks at your at your flying site can be really useful. For example, at one of the sites I fly from, I start my approach flying downwind with reference to a particular tree, and make a turn on to the crosswind leg with reference to a hill, and turn on to final approach with reference to a nearby farm building. Using such landmarks helps your approaches to be consistent.
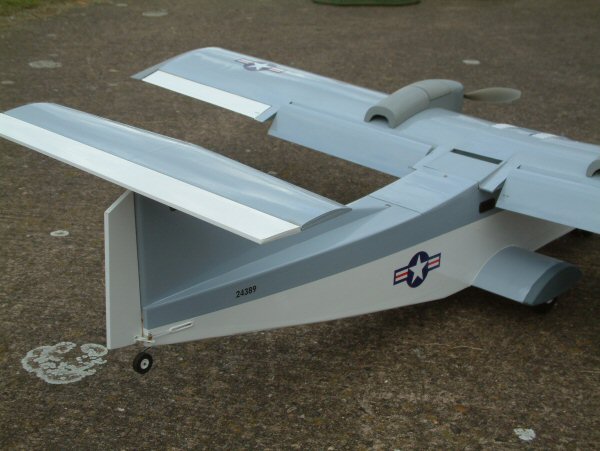
| Use landmarks at your site to help you plan and execute your approach path. | Keep bank angle to a minimum when on approach. |


4. The effects of wind
The wind will of course have an effect on the flight path of the model.
If landing into a wind, you will find you require more power for the approach
compared to landing in no wind conditions. In a strong wind, the difference
can be very significant. The reason for this is that the model effectively
has further to fly to reach the runway if it’s making an approach
into a wind.
Wind can also bring turbulence, so be aware of this possibility and trim for a higher approach airspeed if you feel it’s prudent to do so. Turbulence is more likely at a site if there are obstructions located upwind such as trees and buildings. Remember that turbulence can exist a long way downwind from its source.
| The stable approach is one which is actually easier for the pilot. | A slightly nose up attitude indicates a model approaching at an appropriate speed. |


5. The stable approach
In full size flying, it’s said that a good quality landing is the
result of a good quality approach. The same principle applies equally
to model flying. While it’s still possible to make a good landing
following a poor approach, a good landing is a great deal more likely
if it follows a good quality approach.
But how do we recognize a good quality approach? For this, we can borrow another idea from full size flying, where the concept of the stable approach is emphasized. A stable approach is one where the aircraft’s speed and rate of descent are both correct and constant. The importance of the stable approach is such that all airlines require pilots to go around if their approach has not become stable by a certain point.
A good quality, stable approach is one with the following characteristics:
- The airplane is trimmed for a sensible approach speed
- Only a few, relatively small control inputs are required during the approach
- All control inputs are smooth and gentle
- The power setting does not need to be varied greatly during the approach
- Turns are always made with a small angle of bank.
- The aircraft arrives at the threshold of the runway at a sensible height and speed
In the next part of this article, we’ll examine the process of landing itself.